
while i was working on my skirt and losing pins everywhere,
i thought about those handy wrist pin cushions that i've seen but never actually bought...
so i decided to make myself one and take pictures along the way so you can make one too!

SUPPLIES
- scissors, needle, embroidery thread
- elastic (even a spare hair tie would work)
- pretty fabric
- felt
- stuffing fluffing
- a little piece of cardboard (i ripped off a tab from a cereal box and it was the perfect size!)

since the cardboard piece i had was the perfect size,
i used that as a guide to cut out the fabric and felt,
leaving some extra for seam allowance.
then i sewed the fabric to the felt with a straight stitch using the embroidery thread
only along three of the sides.
that's when i slid in the cardboard in and filled it with fluff, then sewed that side shut.
(in case you're wondering about the cardboard,
i have a habit of stabbing myself all the time with pins,
and thought if there was something stiff at the bottom of the cushion
i would be less likely to hurt myself... haha!)

just to add an extra bit of cuteness, i decided to cut a scalloped edge on the felt.
pinking shears would look cute too, but i still need to buy some of those...

measure out the elastic to fit comfortably on your wrist
and then sew it on the back.
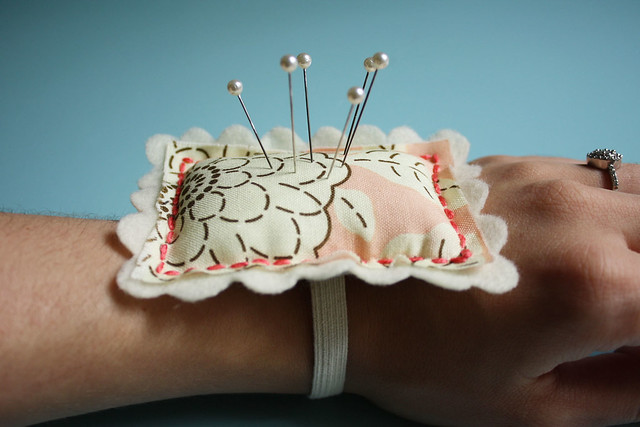
then stick a couple pins in and you're ready to go!
i am so happy with how cute it turned out
considering it only took about an hour to make.
now i'm ready for some marathon sewing!
i hope you found this tutorial helpful,
be sure to let me know if it inspired you to make a new pincushion!

This is adorable! Love it.
ReplyDeleteKatie x
What a cute DIY idea! Saw this on craftgawker and had to check it out!
ReplyDeleteI'm your newest follower by the way :)
What camera do you use, btw? Your pictures are great!
Love,
The Creative Muslimah @ www.thecreativemuslimah.blogspot.com
adorable I love how you changed the wrist band :D
ReplyDeleteI love it. Would love to make one with a vintage hankie....
ReplyDeleteThanks so much
Michelle
Found you thru craft gawker by the way.
Really cute! I'm going to make one this weekend!
ReplyDeletethis is very cute! and very useful ^_^
ReplyDeleteGreat idea! Just found it. Always wanted to make one and this is the easy one to make. I can make it and give as a little gift.
ReplyDelete